当前位置 : 首页 » 文章分类 : » Elasticsearch-安装及工具
Elasticsearch-安装及工具
Elasticsearch 安装及工具
安装 Elasticsearch
Helm Chart 在 Kubernetes 集群安装 Elasticsearch 8.18.1
前提:
已有 Kubernetes 集群 v1.20.15
已安装 helm 命令工具 v3.6.3
1. 下载 elasticsearch helm chart
1、添加 elastic 官方 helm 仓库
helm repo add elastic https://helm.elastic.co
# 更新仓库
helm repo update
2、下载 chart 包
helm pull elastic/elasticsearch
当前目录中得到 elasticsearch-8.5.1.tgz
虽然 chart 版本是 8.5.1,但其中的镜像 tag 可以更新为任意 8.x 的镜像,后续我们更新为 8.18.1
解压 tar -xzvf elasticsearch-8.5.1.tgz 得到 elasticsearch 目录
2. 拉取 elasticsearch:8.18.1 镜像
使用 elastic 官方镜像 docker pull docker.elastic.co/elasticsearch/elasticsearch:8.18.1
或者 dockerhub 中的官方镜像 docker pull elastic/elasticsearch:8.18.1
国内下载慢的话,还可以用加速代理,例如
1毫秒镜像 docker pull docker.1ms.run/elastic/elasticsearch:8.18.1
小跟班镜像 docker pull docker.xiaogenban1993.com/elastic/elasticsearch:8.18.1
3. 构建带 IK 分词器的 elasticsearch:8.18.1 镜像
创建并进入空目录 elasticsearch-8.18.1-ik-image
1、下载 elasticsearch-analysis-ik-8.18.1.zip
根据 https://github.com/infinilabs/analysis-ik 最新说明,在 https://release.infinilabs.com/analysis-ik/stable/ 选择对应的 ik 插件版本下载
wget https://release.infinilabs.com/analysis-ik/stable/elasticsearch-analysis-ik-8.18.1.zip
2、创建 elasticsearch-8.18.1-ik.Dockerfile 文件
# 基于 8.18.1 官方镜像
FROM elastic/elasticsearch:8.18.1

# 将 IK 分词器压缩包复制到临时目录
COPY elasticsearch-analysis-ik-8.18.1.zip /tmp/

# 安装插件
RUN elasticsearch-plugin install --batch file:///tmp/elasticsearch-analysis-ik-8.18.1.zip
3、构建镜像
docker build -t elasticsearch:8.18.1-ik -f elasticsearch-8.18.1-ik.Dockerfile .
4、打 tag 为私服镜像
docker tag elasticsearch:8.18.1-ik hub.docker.myapp.com/elastic/elasticsearch:8.18.1-ik
# 推到私服仓库
docker push hub.docker.myapp.com/elastic/elasticsearch:8.18.1-ik
4. 使用 elasticsearch-certutil 生成证书
elasticsearch 镜像内自带 elasticsearch-certutil 证书工具
具体步骤:
1、使用 elasticsearch:8.18.1 镜像内自带的 elasticsearch-certutil 工具生成证书
包含两个步骤:
elasticsearch-certutil ca生成 CA 证书,--pass ''表示不需要密码,否则会交互式提示 “Enter password for elastic-stack-ca.p12 :” 中断命令elasticsearch-certutil cert基于 CA 证书签发节点证书。
docker run -i --name elastic-helm-charts-certs \
  docker.elastic.co/elasticsearch/elasticsearch:8.18.1 \
  /bin/sh -c "elasticsearch-certutil ca --out /tmp/elastic-stack-ca.p12 --pass '' \
  && elasticsearch-certutil cert --ca /tmp/elastic-stack-ca.p12 --ca-pass '' --out /tmp/elastic-certificates.p12 --pass ''"
注意:这种证书结构是内部私有 CA 签名证书,而不是由公共信任的 CA(如 Let’s Encrypt、DigiCert 等)签发的证书。
2、将 elastic-helm-charts-certs 容器内的证书文件 elastic-certificates.p12 拷贝到本地,删除临时容器,在 es8 命名空间创建 k8s secret
docker cp elastic-helm-charts-certs:/tmp/elastic-certificates.p12 ./ && \
docker rm -f elastic-helm-charts-certs && \
kubectl create secret -n es8 generic elastic-certificates --from-file=elastic-certificates.p12
5. 创建 values.yaml chart 配置(有账号密码,无https)
创建 es8-values.yaml chart 配置文件
核心配置项:
image和imageTag使用私服仓库的带 ik 分词器的 elasticsearch:8.18.1 镜像createCert: false关闭默认证书配置,否则会自动将下面几个 enabled 配置项都启用xpack.security.enabled: true开启账号密码配置secret.enabled: true和secret.password: "es-pswd"自定义 elastic 账号的密码xpack.security.transport.ssl.enabled: true开启传输层 SSL,需要配置证书xpack.security.http.ssl.enabled: false关闭 http 层 SSL,这样就不需要使用 https 接口了
注意:Elasticsearch 8.x 中,开启 xpack.security.enabled: true 后,必须同时启用 xpack.security.transport.ssl.enabled: true
- 生产环境(多节点或非环回地址)会触发 Bootstrap 检查,若发现传输层未加密,则直接拒绝启动。这是为了防止未加密的节点间通信导致敏感数据泄露。
- 单节点环境
discovery.type: single-node启动也会报 WARN 提示必须启用xpack.security.transport.ssl.enabled: true,但忽略不管也不影响使用
# 私服镜像
image: "hub.docker.myapp.com/elastic/elasticsearch"
imageTag: "8.18.1-ik"

# 修改 Kubernetes Service 配置
service:
  # 如果使用 NodePort 类型的 Service,可以指定特定的 nodePort
  type: NodePort  # 或者 ClusterIP、LoadBalancer 等
  nodePort: 9201  # 为 HTTP 服务指定 NodePort

# 集群名称也最好修改,避免与现有集群混淆
clusterName: elasticsearch-v8

# 自定义密码配置
secret:
  enabled: true
  password: "es-pswd"

# 关闭默认证书配置
createCert: false

# 就绪探针的协议,开启 xpack.security.http.ssl.enabled 时必须设为 https,否则设为 http
protocol: http

esConfig:
  elasticsearch.yml: |
    # 启用安全功能
    xpack.security.enabled: true
    # 保留传输层 SSL (节点间通信),用于集群内部通信
    xpack.security.transport.ssl.enabled: true
    xpack.security.transport.ssl.verification_mode: certificate
    xpack.security.transport.ssl.keystore.path: /usr/share/elasticsearch/config/certs/elastic-certificates.p12
    xpack.security.transport.ssl.truststore.path: /usr/share/elasticsearch/config/certs/elastic-certificates.p12
    # 禁用 HTTP 层的 SSL
    xpack.security.http.ssl.enabled: false

secretMounts:
  - name: elastic-certificates
    secretName: elastic-certificates
    path: /usr/share/elasticsearch/config/certs
6. 创建 es8 命名空间
我的环境在 Kubernetes default 命名空间已有一套 Elasticsearch 7.x 集群,为避免端口等冲突,新建一个命名空间来安装 Elasticsearch 8.x
创建 Kubernetes 命名空间 es8
kubectl create namespace es8
7. 安装 elasticsearch helm chart
指定 es8-values.yaml 配置文件安装 chart
在 elasticsearch 目录的同层执行,安装 chart 到 es8 命名空间
helm install elasticsearch-v8 ./elasticsearch -f es8-values.yaml -n es8
如果安装后 pod 等状态异常要修改配置,可以删除 release,改配置后重新安装:
helm uninstall elasticsearch-v8 -n es8
Elasticsearch 8.18.1 安装启动问题
SSL certificate problem: unable to get local issuer certificate
问题:
使用 elasticsearch 8.18.1 默认认证配置,启动后容器内 curl https://127.0.0.1:9200 报错如下:
$ curl https://127.0.0.1:9200 -u elastic:es-pswd
curl: (60) SSL certificate problem: unable to get local issuer certificate
More details here: https://curl.haxx.se/docs/sslcerts.html

curl failed to verify the legitimacy of the server and therefore could not
establish a secure connection to it. To learn more about this situation and
how to fix it, please visit the web page mentioned above.
curl 加 -k 参数可忽略 ssl 相关问题正常返回。
原因:
典型的 SSL 证书验证失败问题
这个错误表明 curl 无法验证 Elasticsearch 服务器提供的 SSL 证书,因为它找不到签发该证书的证书颁发机构 (CA)。
当添加 -k 参数时,curl 会跳过证书验证,这就是为什么加上该参数后连接成功的原因。
Elasticsearch 在 Kubernetes 上部署时,会自动生成自签名证书。这些证书不是由公共信任的 CA 签发的,所以客户端(如 curl)默认不信任它们。
解决:
使用 elasticsearch 镜像内自带的证书工具 elasticsearch-certutil 生成证书并通过 Kubernetes Secret 挂载证书。
SSL certificate problem: self signed certificate in certificate chain
问题:
通过 es 内置 elasticsearch-certutil 工具生成并配置证书启动 elasticsearch 8.18.1 后
(1)在外部命令行中 curl 报错如下:
curl https://127.0.0.1:9200 -u elastic:es-pswd
curl: (60) SSL certificate problem: self signed certificate in certificate chain
More details here: https://curl.se/docs/sslcerts.html

curl failed to verify the legitimacy of the server and therefore could not
establish a secure connection to it. To learn more about this situation and
how to fix it, please visit the web page mentioned above.
(2)如果在浏览器访问 https://127.0.0.1:9200,会弹出账号密码输入框,输入后可显示 es 的默认 curl 结果
但会提示 https 不安全,证书颁发者:公用名 (CN) Elastic Certificate Tool Autogenerated CA
原因:
curl(以及其他客户端工具)默认只信任操作系统内置的 CA 证书存储中的权威 CA 机构。
elasticsearch-certutil 工具的 CA 是一个私有 CA,不在这个可信 CA 列表中,因此 curl 将其视为不可信,报告”self signed certificate in certificate chain”错误。
解决:
方法1,开发/测试环境中,导出并使用内部 CA 证书
# 从您已有的 p12 文件中导出 CA 证书
openssl pkcs12 -in elastic-certificates.p12 -cacerts -nokeys -out elastic-ca.pem -passin pass:""

# 使用该 CA 证书进行 curl 请求
curl --cacert elastic-ca.pem https://127.0.0.1:9201 -u elastic:es-pswd
方法2,开发/测试环境中,使用 -k 选项忽略 ssl 问题
curl -k https://127.0.0.1:9200 -u elastic:es-pswd
方法3,生产环境中,获取公共 CA 签名证书
获取由公共 CA 签发的证书(域名需匹配您的 Elasticsearch 访问地址)
将证书、私钥和 CA 证书转换为适合 Elasticsearch 使用的格式
更新 Elasticsearch 配置以使用这些证书
Mac Brew 安装 Elasticsearch
brew tap elastic/tap
brew install elastic/tap/elasticsearch-full
https://www.elastic.co/guide/en/elasticsearch/reference/7.17/brew.html
Docker 安装 Elasticsearch 7.6.0
Install Elasticsearch with Docker
https://www.elastic.co/guide/en/elasticsearch/reference/7.6/docker.html
拉取 Elasticsearch 7.6.0 官方 Docker 镜像
从 Elasticsearch 官方仓库 拉取 Elasticsearch 7.6.0 官方镜像
docker pull docker.elastic.co/elasticsearch/elasticsearch:7.6.0
或者
从 docker hub 拉取 Elasticsearch 7.6.0 官方镜像
https://hub.docker.com/_/elasticsearch
docker pull elasticsearch:7.6.0
我更偏向于从默认的 docker hub 拉取,不需要额外指明仓库前缀。
注意 es 没有 latest 标签,必须指明具体的版本号,否则提示:
Error response from daemon: manifest for elasticsearch:latest not found: manifest unknown: manifest unknown
Docker 中以 single 模式启动 Elasticsearch 7.6.0
docker run -d \
--rm \
--network host \
--name es \
-e "discovery.type=single-node" \
-e ES_JAVA_OPTS="-Xms512m -Xmx512m" \
-v /home/centos/git/masikkk/search/es/elasticsearch.yml:/usr/share/elasticsearch/config/elasticsearch.yml \
-v /data/es:/usr/share/elasticsearch/data \
elasticsearch:7.6.0
解释下:-d 后台运行--rm 停止容器后删掉容器文件--network host 与宿主机完全共享网络,默认是bridge桥接,无法在nginx中通过localhost转发请求。一般都是通过 -p 9200:9200 -p 9300:9300 做端口映射,我直接共享宿主机网络了。--name es 指定启动的容器名,方便按名称stop等操作-e 设置两个环境变量,es的模式,jvm堆大小-v 映射配置文件,具体说是宿主机配置文件覆盖容器中的配置文件,我的配置文件在 git 仓库中,方便保存,也可以记录修改历史。-v /data/es:/usr/share/elasticsearch/data 把本地目录映射到容器,一遍容器销毁后能保存es数据
docker安装elasticsearch和kibana (7.5.0)
http://www.leileitang.com/views/article/2019/120904.html
curl localhost:9200 测试
es 默认以 9200 端口启动,在服务器本地 curl localhost:9200,结果如下
{
  "name" : "node-1",
  "cluster_name" : "docker-es",
  "cluster_uuid" : "FLmzxlAdQzK0TuewMW1SLw",
  "version" : {
    "number" : "7.6.0",
    "build_flavor" : "default",
    "build_type" : "docker",
    "build_hash" : "7f634e9f44834fbc12724506cc1da681b0c3b1e3",
    "build_date" : "2020-02-06T00:09:00.449973Z",
    "build_snapshot" : false,
    "lucene_version" : "8.4.0",
    "minimum_wire_compatibility_version" : "6.8.0",
    "minimum_index_compatibility_version" : "6.0.0-beta1"
  },
  "tagline" : "You Know, for Search"
}
Elasticsearch 7.x 配置用户名密码(BasicAuth)
1、修改 config/elasticsearch.yml
xpack.security.enabled: true
xpack.license.self_generated.type: basic
2、在 Docker 容器或 Kubernetes 环境中,可以使用环境变量 $ELASTIC_USERNAME 和 $ELASTIC_PASSWORD 配置用户名和密码:
docker run \n
-e ELASTIC_USERNAME=myuser \n
-e ELASTIC_PASSWORD=mypassword \n
docker.elastic.co/elasticsearch/elasticsearch:7.6.0
Docker 安装 Elasticsearch 8.8.2
Install Elasticsearch with Docker
https://www.elastic.co/guide/en/elasticsearch/reference/8.0/docker.html
1. 拉取 Elasticsearch 8.8.2 官方 Docker 镜像
从 Elasticsearch 官方仓库拉取 Elasticsearch 8.8.2 官方镜像
https://www.docker.elastic.co/r/elasticsearch/elasticsearch
docker pull docker.elastic.co/elasticsearch/elasticsearch:8.8.2
或者
从 docker hub 拉取 Elasticsearch 8.8.2 官方镜像
https://hub.docker.com/_/elasticsearch
docker pull elasticsearch:8.8.2
2. 构建带 IK 分词器的 Elasticsearch 8.8.2 Docker 镜像
在一个空目录创建 Elasticsearch8-ik.Dockerfile
FROM elasticsearch:8.8.2
RUN ./bin/elasticsearch-plugin install --batch https://github.com/medcl/elasticsearch-analysis-ik/releases/download/v8.8.2/elasticsearch-analysis-ik-8.8.2.zip
在当前目录构建 docker build -t elasticsearch:8.8.2-ik -f Elasticsearch8-ik.Dockerfile .
注意 es 与 ik 版本要对应,差最后一位都不行,构建过程中会校验,版本不一致报错:
Exception in thread "main" java.lang.IllegalArgumentException: Plugin [analysis-ik] was built for Elasticsearch version 8.6.1 but version 8.6.2 is running
    at org.elasticsearch.plugins.PluginsUtils.verifyCompatibility(PluginsUtils.java:85)
    at org.elasticsearch.plugins.cli.InstallPluginAction.loadPluginInfo(InstallPluginAction.java:858)
过程打印日志如下:
$ docker build -t elasticsearch:8.8.2-ik -f Elasticsearch8-ik.Dockerfile .
Sending build context to Docker daemon  86.51MB
Step 1/2 : FROM elasticsearch:8.8.2
8.8.2: Pulling from library/elasticsearch
f0412dfb1aae: Pull complete
14bad5883434: Pull complete
c285faa9f620: Pull complete
4f4fb700ef54: Pull complete
7c3d9862ed44: Pull complete
1418c59bacdf: Pull complete
450b0a61ada7: Pull complete
ff6736a97fc1: Pull complete
50880bcf0295: Pull complete
ef243ce31f27: Pull complete
Digest: sha256:acb934176519afa01f195e06b6085a5159401be37cdd70c2fbcd04890581e41b
Status: Downloaded newer image for elasticsearch:8.8.2
 ---> 673e6376a286
Step 2/2 : RUN ./bin/elasticsearch-plugin install --batch https://github.com/medcl/elasticsearch-analysis-ik/releases/download/v8.8.2/elasticsearch-analysis-ik-8.8.2.zip
 ---> Running in c8c28d0e5790
-> Installing https://github.com/medcl/elasticsearch-analysis-ik/releases/download/v8.8.2/elasticsearch-analysis-ik-8.8.2.zip
-> Downloading https://github.com/medcl/elasticsearch-analysis-ik/releases/download/v8.8.2/elasticsearch-analysis-ik-8.8.2.zip
@@@@@@@@@@@@@@@@@@@@@@@@@@@@@@@@@@@@@@@@@@@@@@@@@@@@@@@@@@@
@     WARNING: plugin requires additional permissions     @
@@@@@@@@@@@@@@@@@@@@@@@@@@@@@@@@@@@@@@@@@@@@@@@@@@@@@@@@@@@
* java.net.SocketPermission * connect,resolve
See https://docs.oracle.com/javase/8/docs/technotes/guides/security/permissions.html
for descriptions of what these permissions allow and the associated risks.
-> Installed analysis-ik
-> Please restart Elasticsearch to activate any plugins installed
Removing intermediate container c8c28d0e5790
 ---> f1c85f4ec3f5
Successfully built f1c85f4ec3f5
Successfully tagged elasticsearch:8.8.2-ik
过程中会红字提示 WARNING: plugin requires additional permissions 不过没关系,装插件时加了 --batch 参数就能成功。
容器内的 ik 插件目录: /usr/share/elasticsearch/plugins/analysis-ik
容器内的 ik 插件词典目录: /usr/share/elasticsearch/config/analysis-ik
3. Docker 中 single 模式主机网络启动 Elasticsearch 8.8.2
docker run -d \
--rm \
--network host \
--name es \
-e ES_JAVA_OPTS="-Xms512m -Xmx512m" \
-e "discovery.type=single-node" \
-e "xpack.security.enabled=true" \
-e "xpack.security.http.ssl.enabled=false" \
-v /data/es:/usr/share/elasticsearch/data \
elasticsearch:8.8.2-ik
解释下:-d 后台运行--rm 停止容器后删掉容器文件--network host 与宿主机完全共享网络,默认是bridge桥接,无法在nginx中通过localhost转发请求。一般都是通过 -p 9200:9200 -p 9300:9300 做端口映射,我直接共享宿主机网络了。--name es 指定启动的容器名,方便按名称stop等操作-e 设置4个环境变量,single 模式,jvm堆大小,开启安全特性,但不开启https-v /data/es:/usr/share/elasticsearch/data 把本地目录映射到容器,以便容器销毁后能保存es数据
和安装 7.6 版本时不同,安装 8.x 没有挂载 elasticsearch.yml 配置文件,一方面是挂载报错,另一方面配置文件里的配置项都放在环境变量里更方便,不需要配置文件
Mac 上安装时由于无 host 网络需要开启端口映射:
docker run -d \
--rm \
-p 9200:9200 \
--name es \
-e ES_JAVA_OPTS="-Xms512m -Xmx512m" \
-e "discovery.type=single-node" \
-e "xpack.security.enabled=true" \
-e "xpack.security.http.ssl.enabled=false" \
-v /tmp/esdata:/usr/share/elasticsearch/data \
elasticsearch:8.8.2-ik
4. 关闭 Elasticsearch 8.0 默认打开的安全特性
Elasticsearch 8.0 默认是打开安全特性的,需要 https 访问,需要证书、账号密码,本地测试使用不方便。
启动 es 时添加下面配置,关闭安全特性,之后不需要 https 访问,也不需要输入用户名密码了。
xpack.security.enabled: false
xpack.security.http.ssl.enabled: false
Elastic Stack 8.0 安装 - 保护你的 Elastic Stack 现在比以往任何时候都简单
https://elasticstack.blog.csdn.net/article/details/122874932
5. 开启 Elasticsearch 8.0 基本安全配置(有账号密码,无https)
只开启 Basic authentication 即账号密码访问,但不开启 SSL/TLS(HTTPS)
1、修改配置如下,开启安全配置,但不开启 ssl
xpack.security.enabled: true
xpack.security.http.ssl.enabled: false
启动时提示开启安全配置后必须开启 ssl,但 discovery.type=single-node 模式下(单节点模式,即非生产模式)可忽略此提示继续使用基本安全配置
{"@timestamp":"2023-09-09T06:54:41.125Z", "log.level": "WARN", "message":"Transport SSL must be enabled if security is enabled. Please set [xpack.security.transport.ssl.enabled] to [true] or disable security by setting [xpack.security.enabled] to [false]", "ecs.version": "1.2.0","service.name":"ES_ECS","event.dataset":"elasticsearch.server","process.thread.name":"main","log.logger":"org.elasticsearch.bootstrap.BootstrapChecks","elasticsearch.node.name":"lightsail","elasticsearch.cluster.name":"docker-cluster"}
开启安全特性后,直接 curl localhost:9200 会报错:
{
  "error": {
    "root_cause": [
      {
        "type": "security_exception",
        "reason": "missing authentication credentials for REST request [/]",
        "header": {
          "WWW-Authenticate": [
            "Basic realm="security" charset="UTF-8"",
            "ApiKey"
          ]
        }
      }
    ],
    "type": "security_exception",
    "reason": "missing authentication credentials for REST request [/]",
    "header": {
      "WWW-Authenticate": [
        "Basic realm="security" charset="UTF-8"",
        "ApiKey"
      ]
    }
  },
  "status": 401
}
2、Docker 启动 es 容器后,docker exec -it es bash 进入 es 容器
进入后默认在 /usr/share/elasticsearch 目录下
可以使用 elasticsearch-setup-passwords 命令行工具交互式设置 es 内置用户密码:
./bin/elasticsearch-setup-passwords interactive
******************************************************************************
Note: The 'elasticsearch-setup-passwords' tool has been deprecated. This       command will be removed in a future release.
******************************************************************************

Initiating the setup of passwords for reserved users elastic,apm_system,kibana,kibana_system,logstash_system,beats_system,remote_monitoring_user.
You will be prompted to enter passwords as the process progresses.
Please confirm that you would like to continue [y/N]
但是提示此工具即将废弃,那我们就用最新的工具 elasticsearch-reset-password,给内置用户 elastic 交互式设置密码
./bin/elasticsearch-reset-password -u elastic -i
This tool will reset the password of the [elastic] user.
You will be prompted to enter the password.
Please confirm that you would like to continue [y/N]
elasticsearch-setup-passwords
https://www.elastic.co/guide/en/elasticsearch/reference/current/setup-passwords.html
elasticsearch-reset-password
https://www.elastic.co/guide/en/elasticsearch/reference/current/reset-password.html
Elasticsearch:设置 Elastic 账户安全
https://elasticstack.blog.csdn.net/article/details/100548174
6. curl localhost:9200 测试
curl localhost:9200
开启账号密码后 curl -u elastic:pswd ‘http://localhost:9200'
或 curl ‘http://elastic:pswd@localhost:9200'
{
  "name" : "lightsail",
  "cluster_name" : "docker-cluster",
  "cluster_uuid" : "n01j6aRZTNef5ReijFdTvQ",
  "version" : {
    "number" : "8.8.2",
    "build_flavor" : "default",
    "build_type" : "docker",
    "build_hash" : "98e1271edf932a480e4262a471281f1ee295ce6b",
    "build_date" : "2023-06-26T05:16:16.196344851Z",
    "build_snapshot" : false,
    "lucene_version" : "9.6.0",
    "minimum_wire_compatibility_version" : "7.17.0",
    "minimum_index_compatibility_version" : "7.0.0"
  },
  "tagline" : "You Know, for Search"
}
Elasticsearch 安装启动问题
vm.max_map_count [65530] is too low
es 启动报错
{"type": "server", "timestamp": "2020-04-18T14:20:24,003Z", "level": "WARN", "component": "o.e.b.BootstrapChecks", "cluster.name": "docker-es", "node.name": "node-1", "message": "max virtual memory areas vm.max_map_count [65530] is too low, increase to at least [262144]" }
或
bootstrap check failure [1] of [1]: max virtual memory areas vm.max_map_count [65530] is too low, increase to at least [262144]
解决:
修改系统 vm.max_map_count 的值:
echo "vm.max_map_count=262144" > /etc/sysctl.conf
sysctl -p
FileSystemException: elasticsearch.yml: Device or resource busy
Docker 安装 Elasticsearch 8.0 时挂载 elasticsearch.yml 报错:
Exception in thread "main" java.nio.file.FileSystemException: /usr/share/elasticsearch/config/elasticsearch.yml.Z_bTEuWoTKq5OukBFf2kZg.tmp -> /usr/share/elasticsearch/config/elasticsearch.yml: Device or resource busy
官方论坛上好像也没解决这个问题,给出的建议是把配置放到 -e 环境变量里。
the default discovery settings are unsuitable for production use
Elasticsearch 8.0 官方的 docker single 模式安装命令中没有指定 -e "discovery.type=single-node" 变量,我以为默认就是 single 模式呢,结果启动时报下面错误,后来加上这个配置才行
bootstrap check failure [1] of [2]: the default discovery settings are unsuitable for production use; at least one of [discovery.seed_hosts, discovery.seed_providers, cluster.initial_master_nodes] must be configured
cannot downgrade a node from version [8.6.2] to version [8.6.1]
{"@timestamp":"2023-03-20T13:45:01.949Z", "log.level":"ERROR", "message":"fatal exception while booting Elasticsearch", "ecs.version": "1.2.0","service.name":"ES_ECS","event.dataset":"elasticsearch.server","process.thread.name":"main","log.logger":"org.elasticsearch.bootstrap.Elasticsearch","elasticsearch.node.name":"lightsail","elasticsearch.cluster.name":"docker-cluster","error.type":"java.lang.IllegalStateException","error.message":"cannot downgrade a node from version [8.6.2] to version [8.6.1]","error.stack_trace":"java.lang.IllegalStateException: cannot downgrade a node from version [8.6.2] to version [8.6.1]\n\tat org.elasticsearch.server@8.6.1/org.elasticsearch.env.NodeMetadata.verifyUpgradeToCurrentVersion(NodeMetadata.java:128)\n\tat org.elasticsearch.server@8.6.1/org.elasticsearch.env.NodeMetadata.upgradeToCurrentVersion(NodeMetadata.java:135)\n\tat org.elasticsearch.server@8.6.1/org.elasticsearch.env.NodeEnvironment.loadNodeMetadata(NodeEnvironment.java:627)\n\tat org.elasticsearch.server@8.6.1/org.elasticsearch.env.NodeEnvironment.<init>(NodeEnvironment.java:326)\n\tat org.elasticsearch.server@8.6.1/org.elasticsearch.node.Node.<init>(Node.java:478)\n\tat org.elasticsearch.server@8.6.1/org.elasticsearch.node.Node.<init>(Node.java:322)\n\tat org.elasticsearch.server@8.6.1/org.elasticsearch.bootstrap.Elasticsearch$2.<init>(Elasticsearch.java:214)\n\tat org.elasticsearch.server@8.6.1/org.elasticsearch.bootstrap.Elasticsearch.initPhase3(Elasticsearch.java:214)\n\tat org.elasticsearch.server@8.6.1/org.elasticsearch.bootstrap.Elasticsearch.main(Elasticsearch.java:67)\n"}
数据目录中存储了 8.6.2 版本的数据,后来启动 8.6.1 版本尝试加载此数据会报错
https://discuss.elastic.co/t/elasticsearch-failed-immediately/196777
AccessDeniedException /usr/share/elasticsearch/data/nodes
想把宿主机目录绑定到 es 容器的 /usr/share/elasticsearch/data 目录,但宿主机目录权限不够,导致es无法启动
org.elasticsearch.bootstrap.StartupException: ElasticsearchException[failed to bind service]; nested: AccessDeniedException[/usr/share/elasticsearch/data/nodes];
ElasticsearchException[failed to bind service]; nested: AccessDeniedException[/usr/share/elasticsearch/data/nodes];
Likely root cause: java.nio.file.AccessDeniedException: /usr/share/elasticsearch/data/nodes
原因: docker 容器对宿主机的 /data/es 目录没有写权限
解决:修改目录权限即可chmod 777 /data/es
或chown -R 1000:1000 /data/es
在使用docker来部署elasticsearch服务时,通常需要把elasticsearch的索引数据和日志数据映射到本地进行持久化存储,但是经常会遇到权限问题:elasticsearch无法读取数据或者无法写入日志文件,主要有两种处理方法:
1、将外部文件权限全部打开,有一定安全风险
2、将镜像内文件与宿主机文件的用户及组id统一,因为在校验权限时通过uid和gid来验证,官方elasticsearch镜像内部为elasticsearch用户,uid和gid为1000,因此我们也将外部用户及组id修改为1000
plugin requires additional permissions
有些 es 插件需要额外的权限,安装时会让用户确认,如果使用自动脚本安装,可设置 --batch 参数,这个参数告诉插件当前是自动脚本安装,自动获取所有权限。
Using custom Docker images
https://www.elastic.co/guide/en/elasticsearch/reference/7.6/docker.html#_c_customized_image
Other command line parameters
https://www.elastic.co/guide/en/elasticsearch/plugins/7.6/_other_command_line_parameters.html
Transport SSL must be enabled if security is enabled on a [basic] license
es pod 启动报错:
ERROR: [1] bootstrap checks failed
[1]: Transport SSL must be enabled if security is enabled on a [basic] license. Please set [xpack.security.transport.ssl.enabled] to [true] or disable security by setting [xpack.security.enabled] to [false]
ERROR: Elasticsearch did not exit normally - check the logs at /usr/share/elasticsearch/logs/det-es-7.log
原因:
启用了安全性,但没有启用传输层安全性(Transport SSL)。默认情况下,Elasticsearch 需要在基础许可证下启用 Transport SSL 以启用安全性。
解决:
方法1、启用Transport SSL
xpack.security.transport.ssl.enabled: true
方法2、禁用安全性:
xpack.security.enabled: false
Elasticsearch 安装 IK 分词器插件
medcl / elasticsearch-analysis-ik
https://github.com/medcl/elasticsearch-analysis-ik
两种方式
1、执行 docker exec 命令进入容器,再按照物理机的步骤来安装,缺点是每次创建容器都要安装一次。
2、打包一个安装了 ik 分词器的 elasticsearch docker 镜像,这样每个容器运行的时都自带了ik分词器。
这里使用第二种方式,步骤在 Docker 安装 Elasticsearch 中。
存储的时候,使用 ik_max_word,搜索的时候,使用 ik_smart
curl -XPOST http://localhost:9200/index/_mapping -H 'Content-Type:application/json' -d'
{
        "properties": {
            "content": {
                "type": "text",
                "analyzer": "ik_max_word",
                "search_analyzer": "ik_smart"
            }
        }

}'
IK 分词器词典配置
IKAnalyzer.cfg.xml ik词典配置文件
容器内词典目录 /usr/share/elasticsearch/config/analysis-ik
IKAnalyzer.cfg.xml 配置文件:
<?xml version="1.0" encoding="UTF-8"?>
<!DOCTYPE properties SYSTEM "http://java.sun.com/dtd/properties.dtd">
<properties>
    <comment>IK Analyzer 扩展配置</comment>
    <!--用户可以在这里配置自己的扩展字典 -->
    <entry key="ext_dict">custom/mydict.dic;custom/single_word_low_freq.dic</entry>
     <!--用户可以在这里配置自己的扩展停止词字典-->
    <entry key="ext_stopwords">custom/ext_stopword.dic</entry>
     <!--用户可以在这里配置远程扩展字典 -->
    <entry key="remote_ext_dict">location</entry>
     <!--用户可以在这里配置远程扩展停止词字典-->
    <entry key="remote_ext_stopwords">http://xxx.com/xxx.dic</entry>
</properties>
自定义词库
1、config/analysis-ik 中创建 custom 目录,并在目录内创建 mydict.dic 文件,mydict.dic 是自定义词库
2、修改 IKAnalyzer.cfg.xml 配置文件
<!--用户可以在这里配置自己的扩展字典 -->
<entry key="ext_dict">/custom/mydict.dic</entry>
热更新 IK 词典
ELK专栏之IK分词器和Java api操作索引–05
https://cloud.tencent.com/developer/article/2128850
使用nginx搭建ik分词器自定义词库
https://blog.csdn.net/Jjs_Object/article/details/119915292
更新词库后需要重建索引
1、词库用于查询query的分词时,不需要重建索引。
2、词库用于索引文档时:
对于已经配置了IK分词的索引,在IK词典冷更新或热更新操作完成后将只对新数据(包含新增数据和更新后的数据)生效。如果您希望对全部数据生效,需要重建索引。
https://help.aliyun.com/zh/es/user-guide/use-the-analysis-ik-plug-in
ik词库不支持带标点符号的词
比如想把 “合理、合法” 当做一个词,默认是不支持的。即使把它放在词库里,还是会被分为两个词,网上有修改 ik 源码支持带标点符号词典的方式。
安装 Kibana
Mac Brew 安装 Kibana
brew tap elastic/tap
brew install elastic/tap/kibana-full
安装结果:
Config: /opt/homebrew/etc/kibana/
If you wish to preserve your plugins upon upgrade, make a copy of
/opt/homebrew/opt/kibana-full/plugins before upgrading, and copy it into the
new keg location after upgrading.
启动:
To start elastic/tap/kibana-full now and restart at login:
brew services start elastic/tap/kibana-full
安装目录:
/opt/homebrew/Cellar/kibana-full/7.17.4: 37,690 files, 630.8MB, built in 48 seconds
配置es地址:
/opt/homebrew/etc/kibana/kibana.yml
elasticsearch.hosts: [“http://10.234.161.158:9200"]
logging.dest: /tmp/kibana.log
https://www.elastic.co/guide/en/kibana/7.17/brew.html
Calling plist_options is disabled
问题
brew install elastic/tap/kibana-full 报错
Error: elastic/tap/kibana-full: Calling plist_options is disabled! Use service.require_root instead.
解决:
参考 https://github.com/elastic/homebrew-tap/issues/146
plist_options :manual => “kibana” 改为 plist_options = “kibana”
Kibana 7.17 不兼容 Elasticsearch 7.6.1
kibana 启动报错:
{“type”:”log”,”@timestamp”:”2023-11-22T13:05:39+08:00”,”tags”:[“error”,”elasticsearch-service”],”pid”:25174,”message”:”This version of Kibana (v7.17.4) is incompatible with the following Elasticsearch nodes in your cluster: v7.6.1 @ 10.233.67.59:9200 (10.233.67.59), v7.6.1 @ 10.233.66.64:9200 (10.233.66.64), v7.6.1 @ 10.233.64.69:9200 (10.233.64.69)”}
Docker 安装 Kibana 7.6.0
拉取 Kibana 7.6.0 官方镜像
https://hub.docker.com/_/kibana
从 dockerhub 拉取 kibana 7.6.0 官方镜像
docker pull kibana:7.6.0
当然也可以从 es 官方镜像仓库拉取
docker pull docker.elastic.co/kibana/kibana:7.6.0
我用的是 docker hub
M1 Mac 7.6.1 arm64 镜像
7.6.1 arm64 镜像
docker pull virb3/kibana:7.6.1-arm64
Docker 启动 Kibana 7.6.0
docker run -d \
--rm \
--network host \
--name kibana \
-e ELASTICSEARCH_HOSTS=http://127.0.0.1:9200 \
kibana:7.6.0
解释下:-d 后台运行--rm 停止容器后删掉容器文件--network host 与宿主机完全共享网络,默认是bridge桥接,无法在nginx中通过localhost转发请求。一般都是通过 -p 5601:5601 做端口映射,我直接共享宿主机网络了。--name kibana 指定启动的容器名,方便按名称stop等操作-e 设置环境变量 ELASTICSEARCH_HOSTS,指定连接的 es 服务地址,不指定的话默认是 http://localhost:9200
注意低版本的 kibana 中用 ELASTICSEARCH_URL 指定 es 地址,高版本中改为 ELASTICSEARCH_HOSTS 了
Kibana Guide [7.6] » Set Up Kibana » Running Kibana on Docker
https://www.elastic.co/guide/en/kibana/current/docker.html#docker
配置 Index
http://localhost:5601
打开 kibana 后首先会让配置 index,我只建立了一个名为 article 的索引,也不需要使用正则匹配,pattern 直接填 article 即可
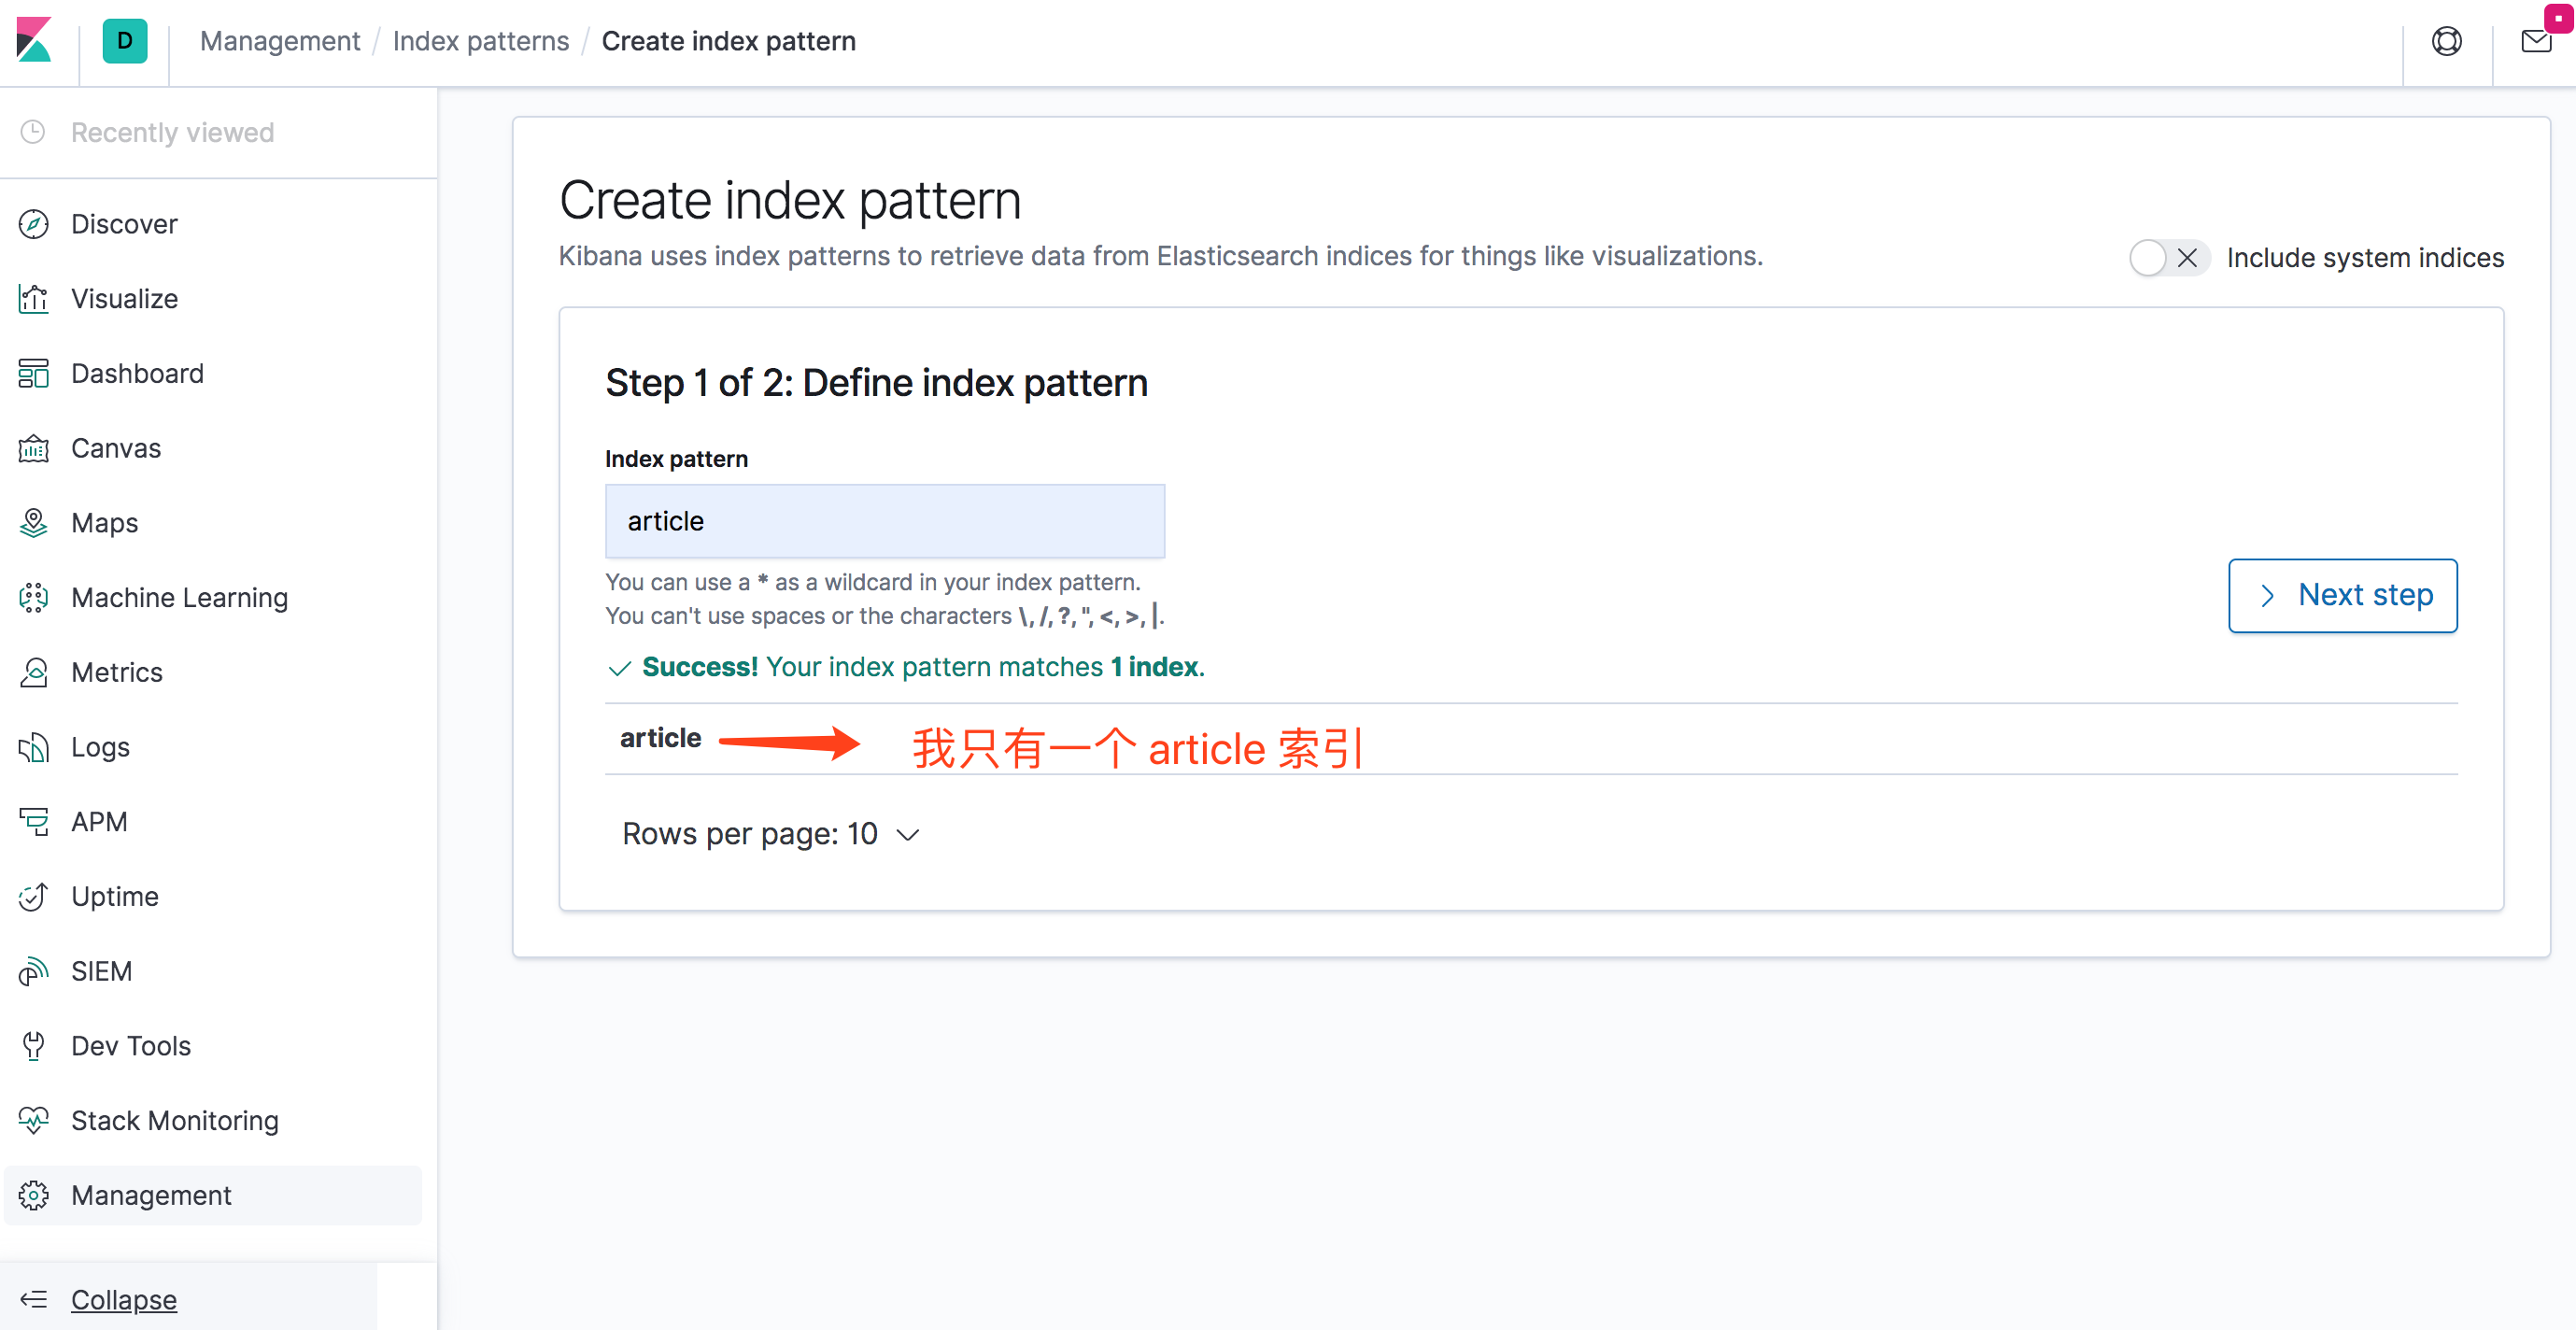
Kibana 创建索引匹配模式
创建完索引匹配模式后,可以直接在 discover 中查看这个模式匹配的索引的数据,这里我直接就可以看到我的 article 索引的所有数据了:
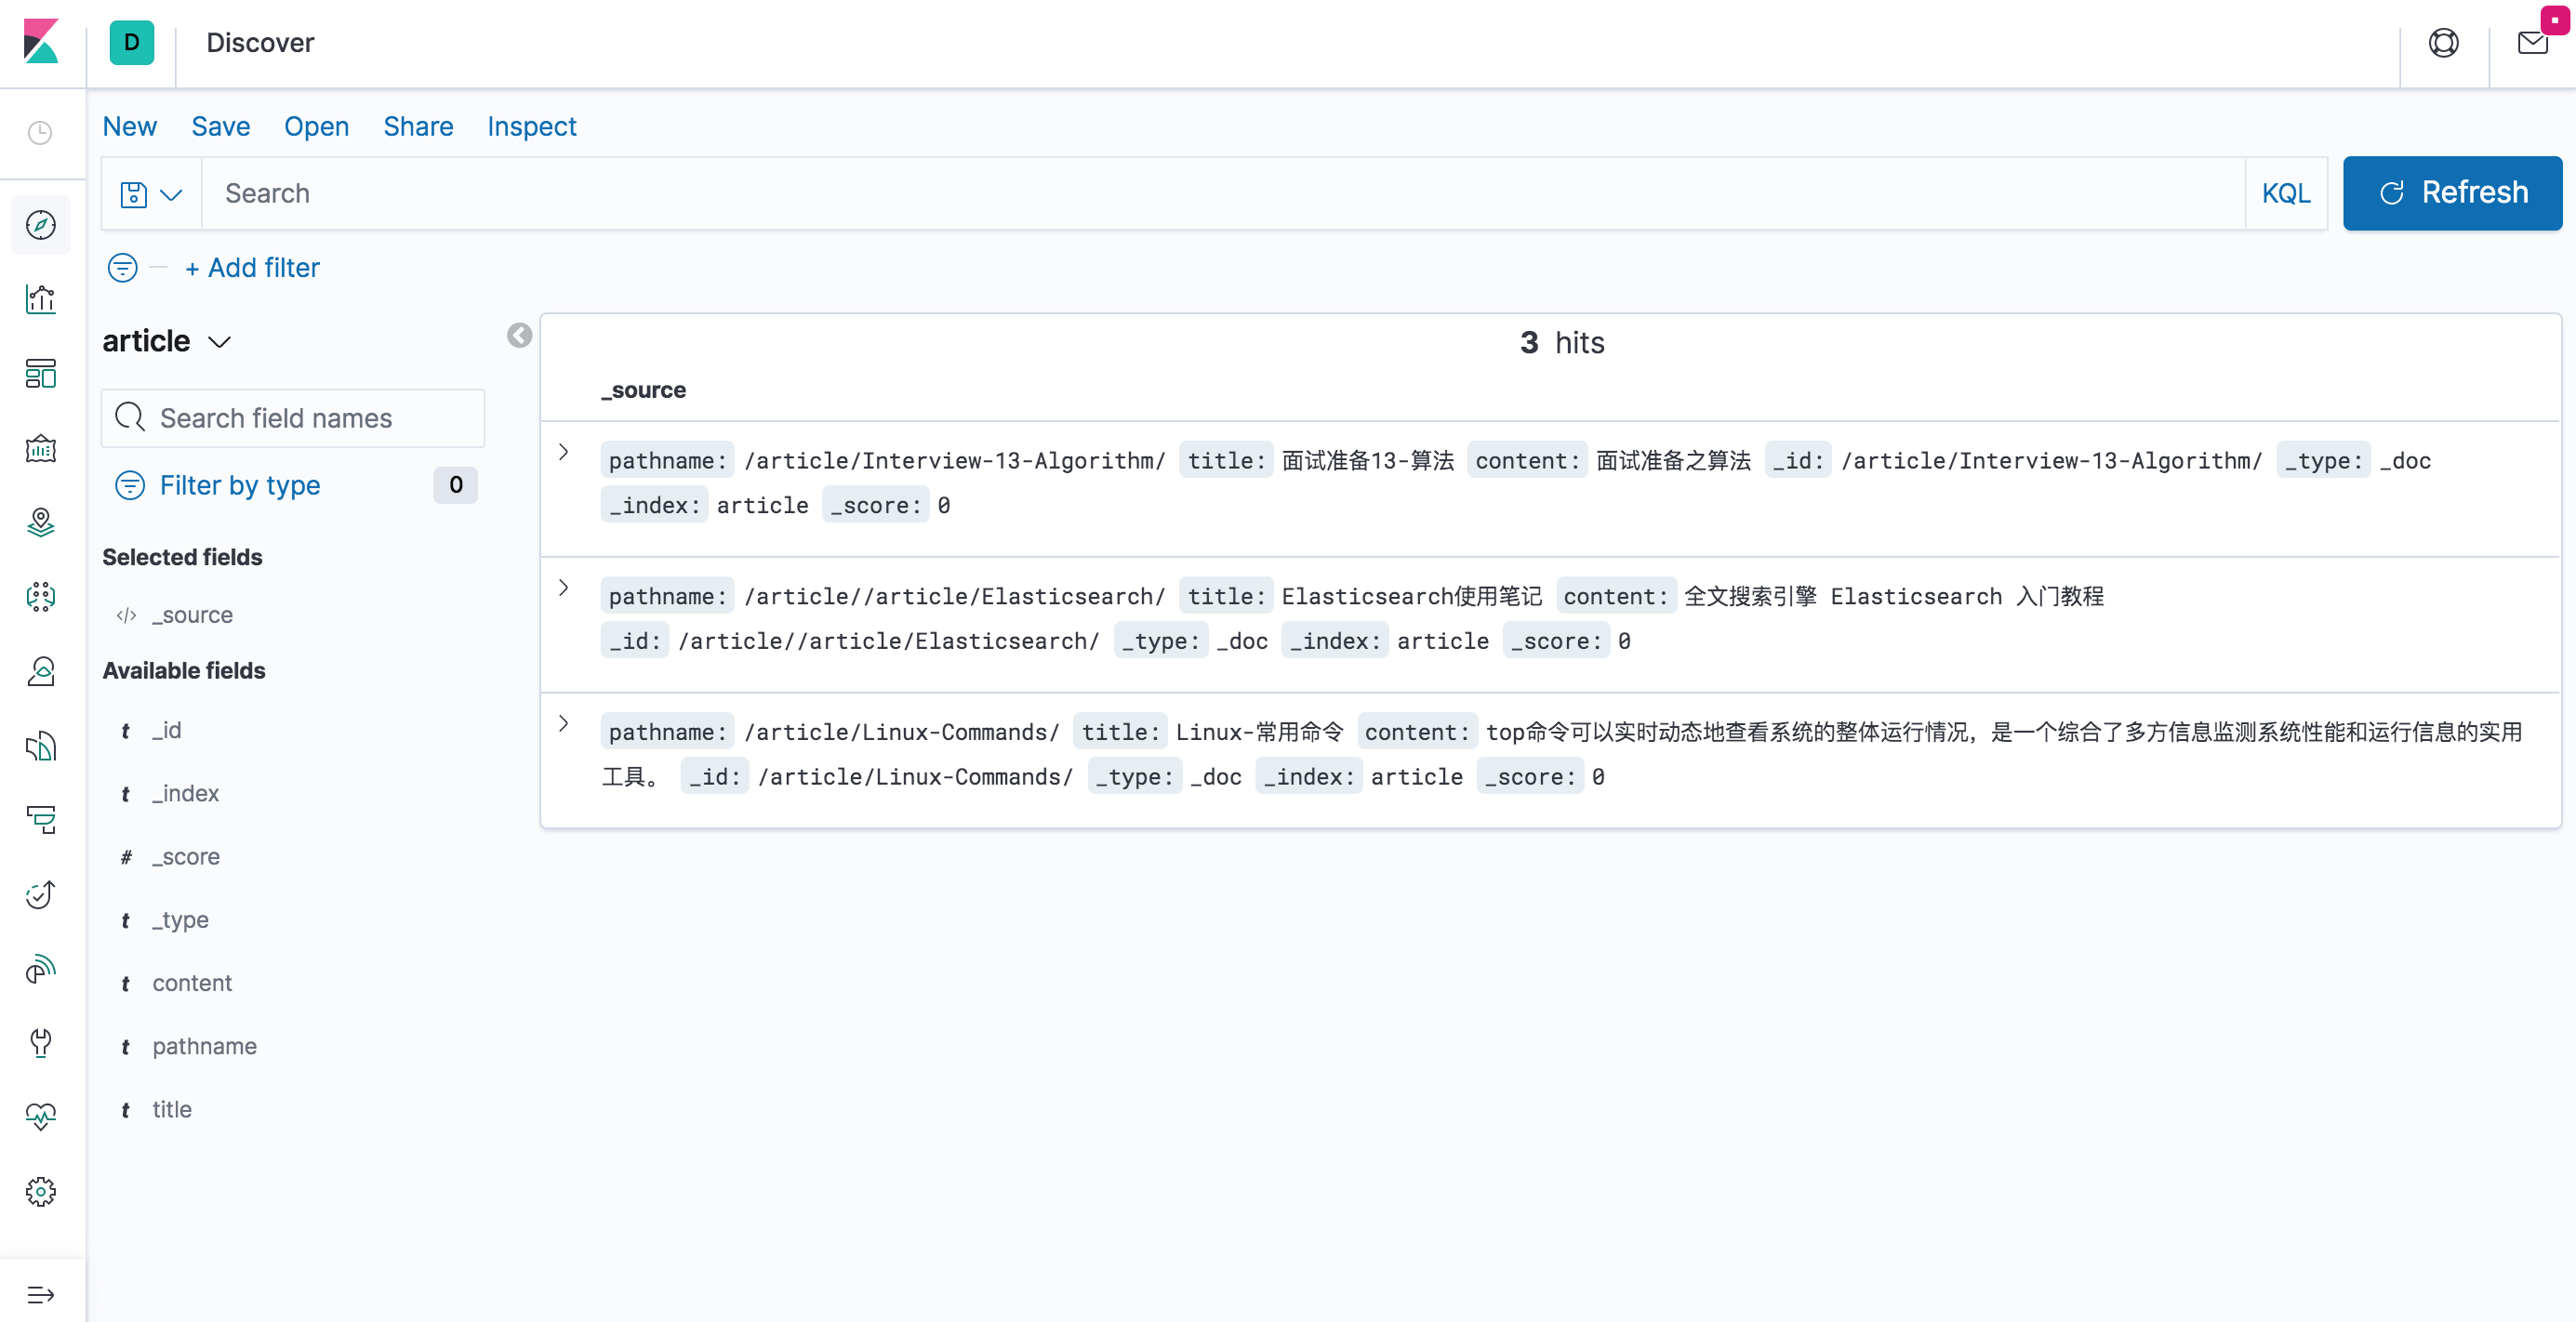
Kibana查看索引数据
Elasticsearch 工具
elasticvue
https://elasticvue.com/
https://github.com/cars10/elasticvue
elastron
https://elastron.eney.solutions/#features
elasticsearch-head
mobz / elasticsearch-head
https://github.com/mobz/elasticsearch-head
elasticsearch-head 是一个 ES 集群的可视化管理界面,可以查看 es 集群信息,查询、操作数据等,否则只能通过 restful api 和 es 交互,不直观。
Docker 安装 elasticsearch-head:5
1、docker 拉取 elasticsearch-head 官方镜像
docker pull mobz/elasticsearch-head:5
2、启动 es-head
docker run -d \
--rm \
--network host \
--name es-head \
mobz/elasticsearch-head:5
默认启动端口 9100 ,可以通过 -p 9100:9100 把容器的 9100 端口暴露出来,我这里为了方便 nginx 转发,直接 --network host 共享主机网络了。
Chrome 扩展安装 elasticsearch-head
打开链接安装插件
https://chrome.google.com/webstore/detail/elasticsearch-head/ffmkiejjmecolpfloofpjologoblkegm
或 Chrome 应用商店中搜索 ElasticSearch Head,提供方:travistx
通过 Chrome 扩展安装的好处是无需启用 es 的 CORS 跨域策略就能连接 es 集群。
elasticsearch-head 已从 Chrome 扩展商店下架,可以使用 Multi Elasticsearch Head 代替
https://chrome.google.com/webstore/detail/multi-elasticsearch-head/cpmmilfkofbeimbmgiclohpodggeheim
elasticsearch-head 连接 ES 集群
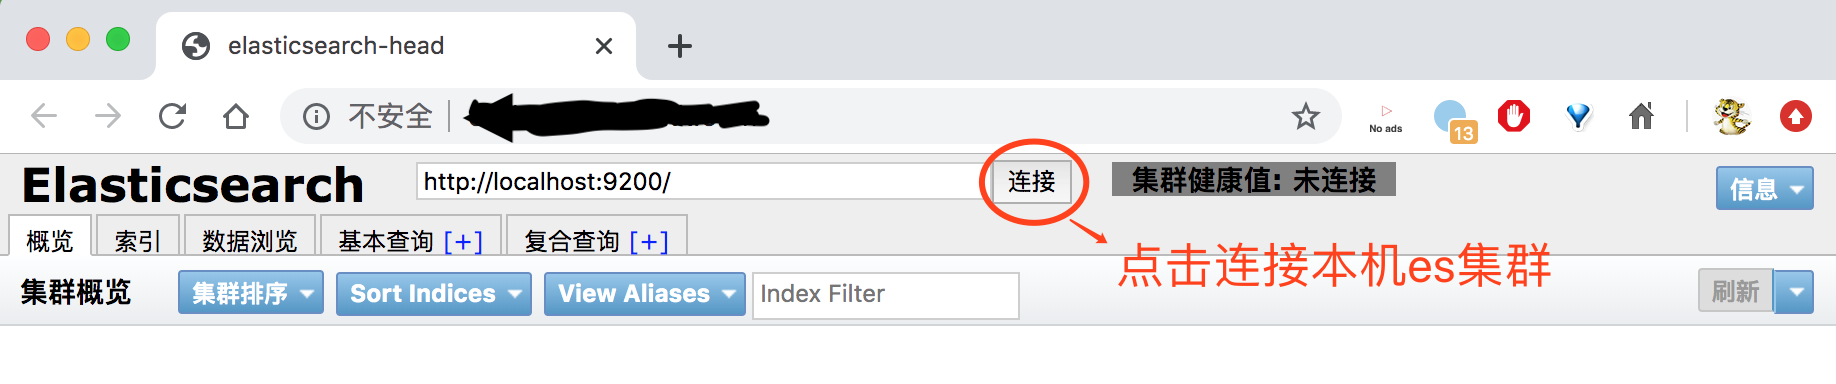
启动后打开 localhost:9100 出现下图,点击连接本地的 es 集群。
elasticsearch-head 初始界面
连接上es集群后如图:
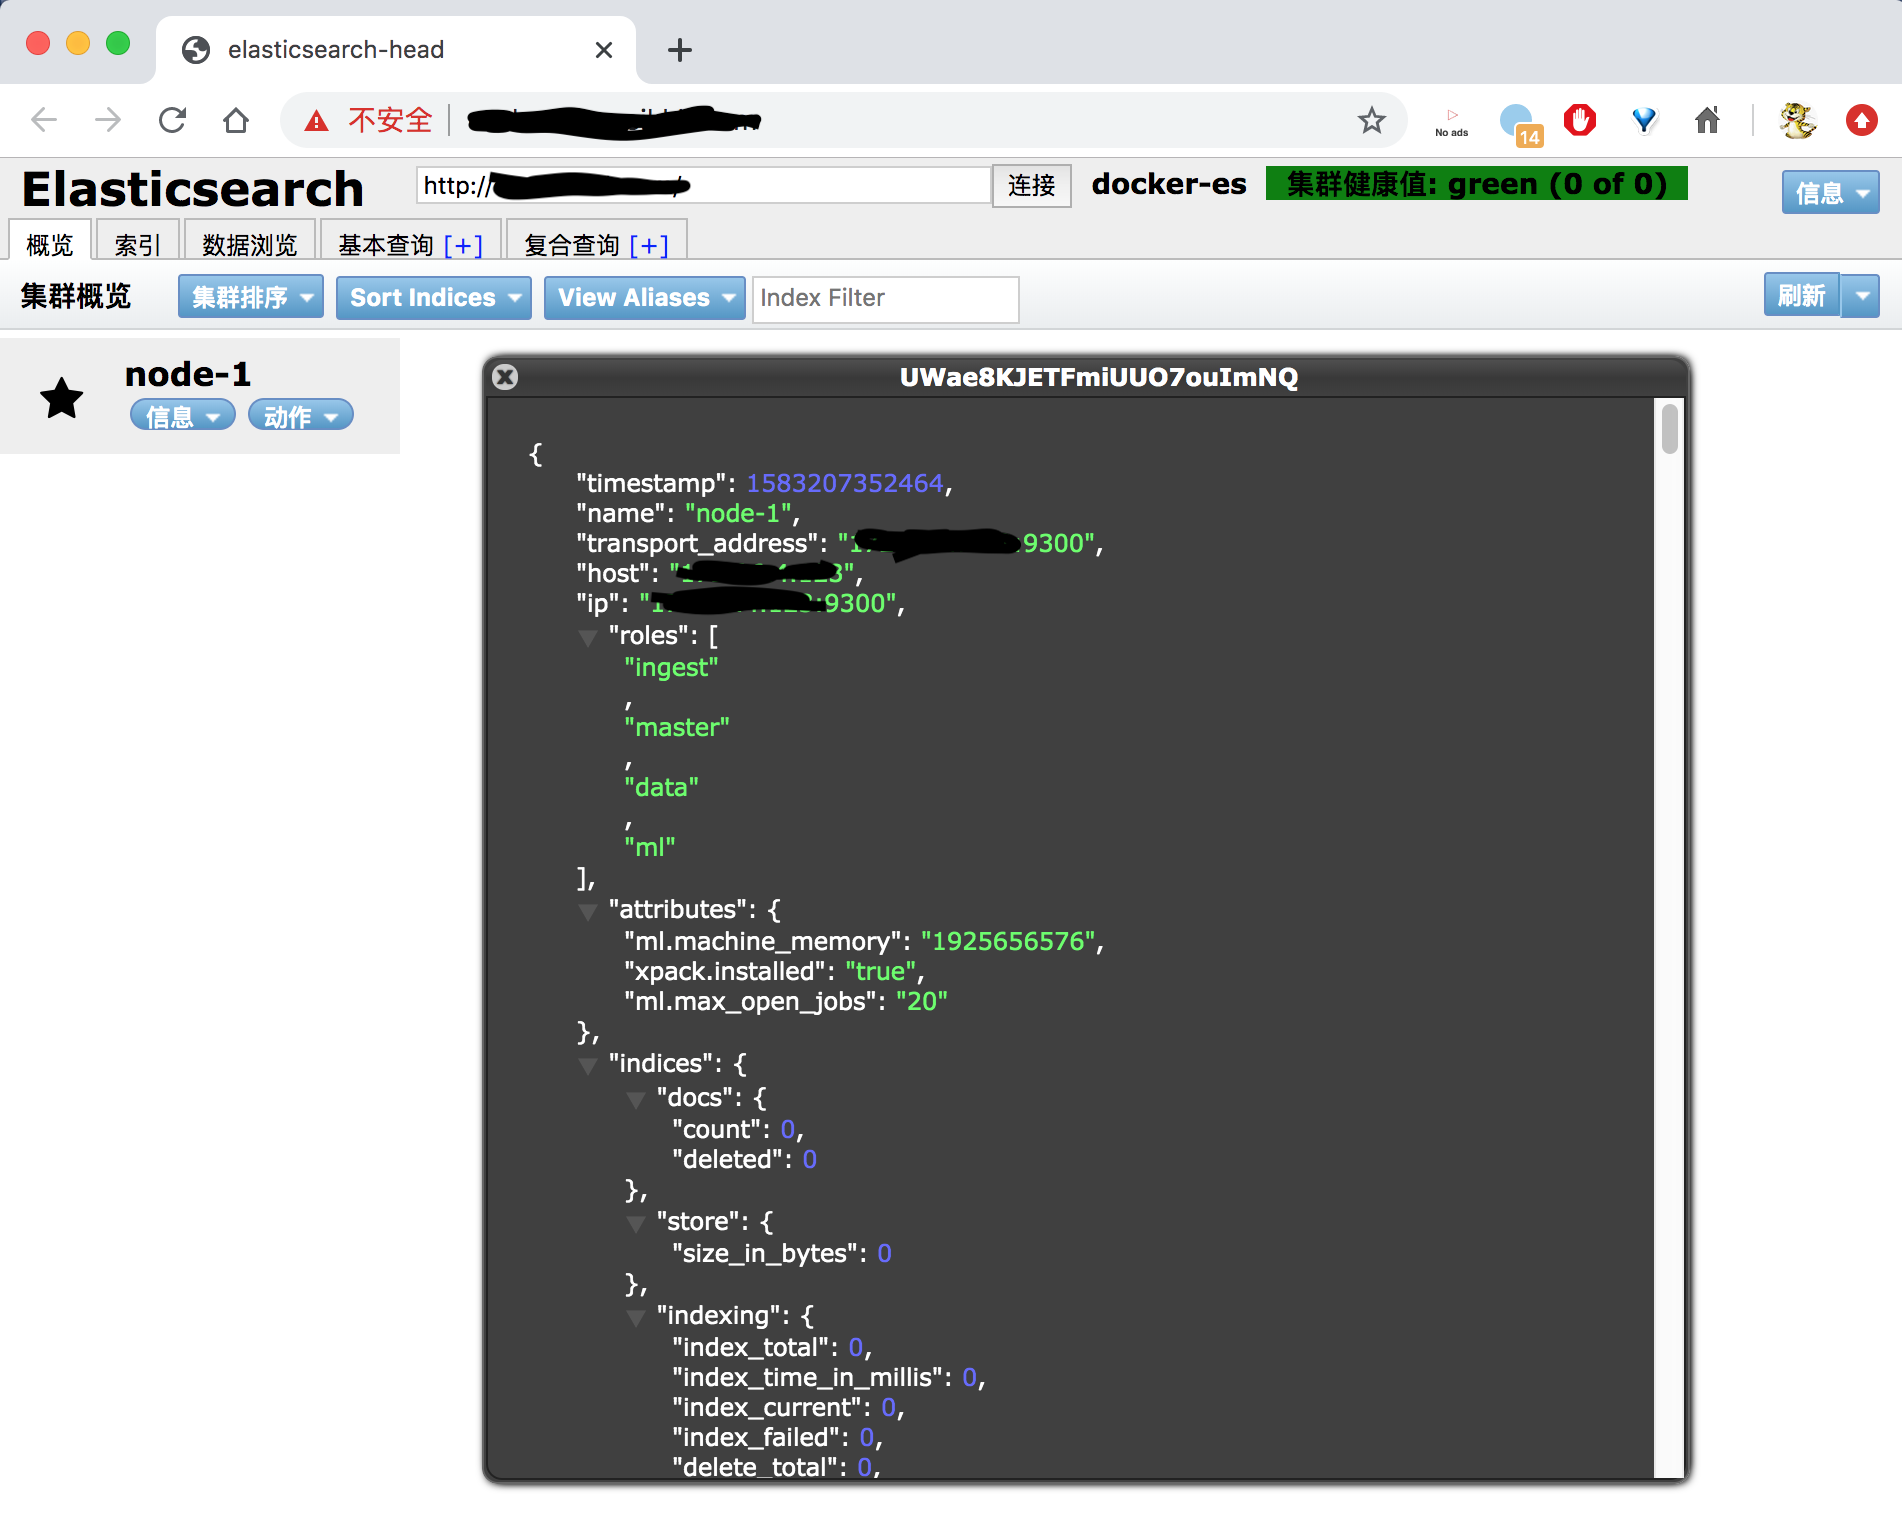
elasticsearch-head 查看ES结点状态
elasticsearch-head 无法连接 ES(ES 未开启跨域)
除了通过 Chrome 插件的形式安装 elasticsearch-head,其他的安装方式都需要 es 本身开启 CORS 跨域才能连接,否则连接不上。
修改elasticsearch.yml,增加如下字段
http.cors.enabled: true
http.cors.allow-origin: "*"
elasticsearch-head 连接高版本 ES 报错 406
问题:
elasticsearch-head:5 连接 es 7.16,概览和索引信息都可以查看,但数据浏览中看不到数据,f12 后台看到返回错误
{
    "error":"Content-Type header [application/x-www-form-urlencoded] is not supported",
    "status":406
}
原因:
高版本 es 增加了严格的 Content-Type 内容类型检查,也是防止 CSRF 攻击的一层保护
解决:
进 es-head 容器,修改 /usr/src/app/_site/vendor.js 文件,将
contentType: “application/x-www-form-urlencoded” 替换为 contentType: “application/json”
有两处要修改,但 es-head 容器内没 vi 编辑器,无法编辑文件。
将 /usr/src/app/_site/vendor.js 从容器中拷贝出来,编辑后再拷贝进容器
docker cp es-head:/usr/src/app/_site/vendor.js ./
docker cp vendor.js es-head:/usr/src/app/_site/vendor.js
elasticsearch-dump
https://github.com/elasticsearch-dump/elasticsearch-dump
离线安装 elasticdump
环境:
1、有网的 Mac 电脑上已安装:
- node v22.3.0
- npm 10.8.1
2、无网的 CentOS7 服务器,未安装 node
一、有网的 Mac 电脑上
1、安装 elasticdump 和 打包工具 npm-pack-all
npm install -g npm-pack-all
npm install -g elasticdump
2、使用 npm-pack-all 将 elasticdump 及其依赖打包
查看全局安装路径
npm root -g
/opt/homebrew/lib/node_modules
进入 /opt/homebrew/lib/node_modules 能看到 elasticdump 目录
进入 /opt/homebrew/lib/node_modules/elasticdump 目录
执行命令 npm-pack-all
完成后目录下出现 elasticdump-6.120.2.tgz
3、下载 nodejs 离线安装包
打开 Node.js 下载页面
https://nodejs.org/en/download
选择 16.20.2 版本,prebuilt 预构建版本,x64 版本下载,得到 node-v16.20.2-linux-x64.tar.xz
二、无网的 CentOS7 服务器上
1、离线安装 nodejs 和 npm
上传 node-v16.20.2-linux-x64.tar.xz
mkdir -p /usr/local/nodejs
tar -xvf node-v16.20.2-linux-x64.tar.xz  -C /usr/local/nodejs
vi /etc/profile 添加
export NODE_HOME=/usr/local/nodejs/node-v16.20.2-linux-x64
export PATH=$NODE_HOME/bin:$PATH
source /etc/profile
查看版本号:
node -v # v16.20.2
npm -v  # 8.19.4
2、离线安装 elasticdump
上传 elasticdump-6.120.2.tgz
使用 npm 全局安装 elasticdump
npm install -g elasticdump-6.120.2.tgz
elasticdump --version  # 6.120.2
使用 elasticdump 迁移数据
分别迁移 settings、mapping、文档数据
elasticdump \
  --input=http://elastic:acg-2024-elasticsearch@127.0.0.1:9200/my_index \
  --output=http://elastic:acg-2024-elasticsearch@127.0.0.1:9201/my_index \
  --type=settings

elasticdump \
  --input=http://elastic:acg-2024-elasticsearch@127.0.0.1:9200/my_index \
  --output=http://elastic:acg-2024-elasticsearch@127.0.0.1:9201/my_index \
  --type=mapping

elasticdump \
  --input=http://elastic:acg-2024-elasticsearch@127.0.0.1:9200/my_index \
  --output=http://elastic:acg-2024-elasticsearch@127.0.0.1:9201/my_index \
  --type=data \
  --limit=1000
目标 Elasticsearch 中索引已存在时的处理
当 elasticdump 迁移数据到目标 Elasticsearch 中已存在的索引时
迁移 settings
默认行为:elasticdump 会尝试更新目标索引的设置,但不会完全替换已有的设置
限制:某些索引设置(如分片数)在索引创建后无法修改
可能的问题:如果目标索引已存在且有不同的不可变设置,迁移可能会失败或部分成功迁移 mapping
默认行为:elasticdump 会尝试合并映射,向现有映射添加新字段
限制:已存在的字段类型无法更改,只能添加新字段
可能的问题:如果源索引和目标索引的字段类型有冲突,迁移会失败迁移 data(数据)
默认行为:elasticdump 会将数据添加到目标索引中
重复数据:如果文档ID相同,会覆盖目标索引中的现有文档
新文档:不存在的文档会被添加到目标索引
页面信息
location:protocol: host: hostname: origin: pathname: href: document:referrer: navigator:platform: userAgent: